Showing posts with label Guide to Jailbreak iPhone 3G. Show all posts


The iPhone Dev team has released a browser-based jailbreak tool known as JailbreakMe that is capable to jailbreak all models of iPhone including iPhone 4, 3GS (both old and new bootrom) and 3G running on the latest version of iOS (i.e. 4.0 or 4.0.1). “Jailbreakme” is even simpler and more user-friendly than Spirit. It is so simple that I wonder if I still need to write a guide for it. For those who do not familiar with the jailbreak process, here is the step-by-step guide to show you the process.

Please read this before your take any further action:

  • JailbreakMe should also work with iPhone that has been jailbroken with blackra1n or Spirit. But before using JailbreakMe, please restore the iPhone to iOS 4.0 / 4.01 via iTunes.
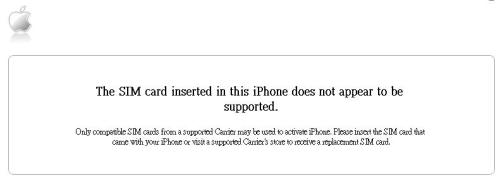
  • JailbreakMe will not hacktivate your iPhone. Your iPhone should be activated before using the browser-based jailbreak tool. You can either purchase an official SIM card or simply borrow it from your friend to activate the iPhone.
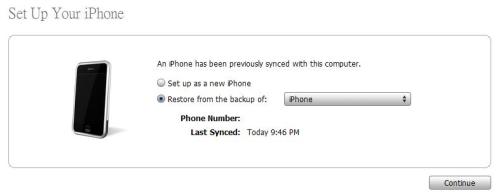
  • Remember to backup all your iPhone data via iTunes. You can simply connect the iPhone to your computer and sync all the data. This step is crucial. In any case you are stuck in the jailbreak process, you can always restore your iPhone back to the original state.
  • Though JailbreakMe should work with iPhone OS v3.x, this guide is intended for those running iOS 4. So, I suppose you have upgraded to iOS 4.0 / 4.0.1. If not, please upgrade it via iTunes.
Step 1: As JailbreakMe is a browser-based jailbreak tool, no software download is required. All you need to do is to launch the mobile Safari on your iPhone and point it to http;//www.jailbreakme.com. If the above link doesn’t work, you can also try out http;//jailbreakme.modmyi.com
Step 2: Simply slide the “slide to jailbreak” slider to kick off the jailbreak process.


Step 3: The whole jailbreak process will take several minutes to complete. Once done, the tool prompts you that cydia has been added to your iPhone. Its done!..and enjoy!


Step 4: You need to unlock after jailbreaking...for iPhone 4, 3GS and 3G user, if you need to unlock the iPhone, you can launch cydia and install ultrasn0w. You can checkout my guide here how to unlock using Ultrasn0w.


TroubleShooting & Fixes

  • You may be stuck after you kick off the jailbreak process. In that case, you can simply reboot your iPhone and go through the whole process again. Usually, the jailbreak should work normally for the next trial.
  • If you are still stuck at the purple screen after reboot, Here are the procedures:

1. Go to Settings -> Safari and then tap “Clear Cache”. Tap again to confirm the cache clean up.

2. Tap “Clear History” to clean up the browser history

3. Tap “Clear Cookies” to clean up the cookies

4. After you clean up the browser cache/history/cookies, reboot the iPhone

5. Once rebooted, point the mobile Safari to http://jailbreakme.com and try again.. Good Luck!


If bought a new computer. The next thing you need is to migrate the existing data from the old computer to the new one. As a regular user of iTunes, you may have a question: How can you backup all your songs, applications, movies in your iTunes library and move to the new computer?

Since iTunes v7.0, Apple has added a “Back up to Disc” feature to let you backup the iTunes library to CD/DVD. The backup feature will backup the following files in your iTunes library:

  • Applications
  • Audiobooks
  • Games
  • Movies
  • Music
  • Music Videos
  • Podcast
  • Ringtones
  • TV Shows

How to Use iTunes’ Backup Feature

To use the backup feature,

1. First, simply click File -> Library -> Back up to Disc.


2. Select the first option “Back up entire iTunes library and playlists” and click “Back Up”

3. Insert a blank disc (CD or DVD) into your optical drive and the backup process will start automatically.

Don’t eject the disc during the process and just wait until the backup completes. If the disc cannot hold all contents of your iTunes library, iTunes will ask you to backup the file to multiple discs. Just follow the instruction to continue.

Restore the iTunes Backup to Your New Computer

After the backup process completes, eject the disc. Go to your new computer and use the disc to restore your iTunes library.

1. First, launch latest iTunes on your new computer.

2. Insert the backup disc into the optical drive

3. iTunes will prompt whether you want to restore from this disc. Click Restore to restore your iTunes library.

Finally, iPhone Dev team changed their mind and released redsn0w 0.8 to jailbreak iPhone 3GS. Redsn0w 0.8 is a light-weight and easy-to-use jailbreak tool to jailbreak iPhone 2G, 3G and 3GS, as well as, iPod Touch 3.0. It supports Windows, Mac OS and Linux platform.

Redsn0w should not be new to you, if you have already jailbroken your iPhone 2G/3G on iPhone 3.0. The latest version (i.e. 0.8) of redsn0w adds the jailbreak support for iPhone 3GS, as well as, comes with the below fixes (according to Bigboss):

1. Proper kernel patches which will enable logome (after it’s updated for 3.0).
2. Supports Mobilesubstrate and Winterboard on iPhone 3GS

Redsn0w v0.8 is a replacement of QuickPwn to jailbreak iPhone 3.0. The jailbreak process is very straightforward that any iPhone owner can manage the jailbreak. Visit at iPhone Dev Team Blog for more information about Redsn0w.

Please read through the below notes before taking action to jailbreak your iPhone 3G:
  • RedSn0W only suitable for the recent iPhone OS 3.0 firmware updated.
  • This jailbreak guide is designed for Windows, Mac OS and Linux platform user only.
  • Redsn0w v0.8 is work for Original iPhone (1st Generation), Original iPod touch, iPod touch 2G, the iPhone 3G and iPhone 3GS.
  • If you’re using lower version of firmware (e.g. 1.1, 2.0, 2.1 or 2.2), you can also follow these jailbreak procedures to upgrade the firmware to 3.0. But please bear in mind, that you’ll have to re-install all the Cydia applications after upgrade. And, at the time I write this post, not all Cydia applications (e.g. AptBackup, iBluetooth, Backgrounder, iRealSMS, MySMS, BossTool, Quickgold) are compatible with iPhone 3.0. So, if you have any cydia applications that you rely on, please ensure its compatibility before upgrading.
Step 1: Make sure you have upgraded to iTunes version 8.2 and backup your iPhone data by synchronizing it with iTunes 8.2.

Step 2: Download Redsn0w v0.8 (Windows / Mac) and iPhone 3G 3.0 firmware. Save them all in the same folder. Extract/unzip Redsn0w. Make sure you have all the files in place before continue.

Installing iPhone 3.0 OS via iTunes 8.2

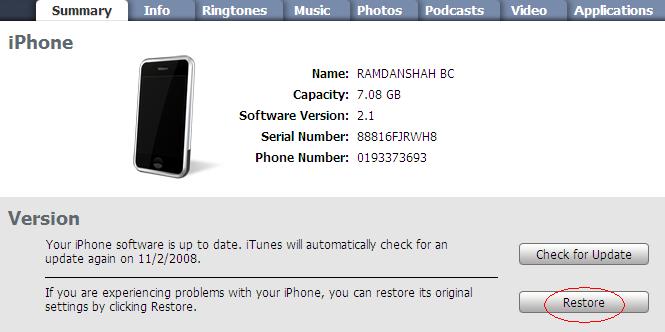
Step 3: Just connect your iPhone to your computer via USB cable and launch iTunes. Select your iPhone in iTunes. You might see all information about you iPhone and the button “Upgrade” and “Restore” appear in iTunes window.

Step 4: Hold the “SHIFT” key and click the “Restore” button simultaneously. The iTunes file dialog will pop up for you to select the firmware file. Locate the “iPhone2,1_3.0_7A341_Restore.ipsw” that you have downloaded in previous step and click “Open”.

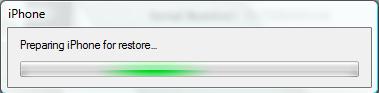
Step 5: iTunes will then restore your iPhone with firmware 3.0 automatically. Keep your iPhone connected, don’t touch anything and wait until the process complete.


Jailbreak using RedSn0w v0.8

Step 6: Your iPhone should completely restore to firmware 3.0. But it’s still locked right now. Please power off your iPhone (but keep it connected with USB cable). However, If your bought unlocked iPhone original from factory settings you iTunes shows that your iPhone is unlock successfully and you don't need to unlock it, just proceed to the next step.

Step 7: Launch RedSn0w to start jailbreak your iPhone 3G. Make sure your iPhone connect via USB cable and then click "Next" button to proceed.


Step 8: You are required to provide the firmware 3.0 IPSW file. Click “Browse” button to locate the “iPhone2,1_3.0_7A341_Restore.ipsw” were you had downloaded in Step 2.

Redsn0w will then verify the firmware file. If it’s correct, redsn0w will show the message “IPSW successfully identified”. Then click “Next” button to continue.

Step 9: You are required to configure the settings for RedSn0w. Normally, you could mark all checkboxes (i.e. Install Cydia, Install Icy). If you would like not to install icy, just left “Install Icy” unmarked. Click "Next" button to proceed.
Step 10: RedSn0w will now instruct you on how to put your iPhone into recovery mode. Disconnect you iPhone 3GS from the computer then power it off. Then hold down the Home button while reconnecting the device to the computer. Don't let go of the button until RedSn0w detects the iPhone and begins installation.

Step 11: If you have successfully put the iPhone into Recovery mode, your iPhone will reboot automatically.
Step 12: Redsn0w will automatically start the jailbreak process. During jailbreaking process, your iPhone screen shows uploading jailbreak data, uploading the new RAM Disk and kernel and flashing NOR progress. What you have to do just keep waiting and don’t touch anything to your iPhone. This process will take 3-5 minutes to complete. Just wait until the process been done.

Step 13: RedSn0w will let you know the jailbreak process is successful. Click the Finish button and your iPhone will be reboot automatically. When your iPhone finishes rebooting (5 minutes or so) it will be jailbroken with Cydia on the SpringBoard.
Step 14: Now jailbreaking process has complete with iPhone 3.0 OS. Finally, sync back your iPhone to restore your backups data with iTunes 8.2.

Step 15: If your iPhone 3G is still unlock and not receive your carrier signal, you can checkout my post on how to unlock iPhone 3GS for OS 3.0 using Ultrasn0w. For those who already use unlocked iPhone version from previous factory setting you can ignore this step. However this step is use full for those who would like to unlock the iPhone 3G.

Step 16: For beginner user, you might be want to know what to do after Jailbreak. Check out my post here on how to use Cydia. For those who already knew about the Cydia you could ignore this step.


This is a good news for iPhone 3G users who do not intentionally upgrade to this version of firmware (Quick tip: It’s always good for you to turn off auto-upgrade in iTunes) and are searching for ways to unlock iPhone. Here I try to show you a solution for that. But, before read on, please note that this solution does not fit for all iPhone 3G. It's specially for unjailbroken iPhone 3G and 2.2.1 firmware users only.

Let me remind you here, "unlock" word is refer to the process to open up your iPhone to accept all carriers. Unlocked iPhone allows you to use SIM card from all carriers. You are no longer bind to the official carrier (e.g. AT&T) approved by Apple. And for, "jailbreak" your iPhone means you are allowed to install 3rd party applications on iPhone. Its mean to say that, this guide only instruct to you about unlocking iPhone 3G 2.2.1 firmware.

Baseband Problem..

Presently, there is no easy way or software to unlock this version of firmware. To be exact, there is no unlock solution to tackle the baseband v2.30.03, which is upgraded together with firmware 2.2.1. The latest version of yellowsn0w, the iPhone 3G unlock solution, doesn’t support iPhone with baseband 2.30.03 or up.

The Solution..

Thanks to the jailbreak community. iPhone developers have created a simple tool called “3G Fuzzyband Downgrader” to downgrade the baseband from 2.30.03 to 2.28.00. By downgrading the baseband, you can then use Yellowsn0w to unlock the iPhone. However, there is a catch. The downgrade utility only supports iPhone with bootloader v5.8. Don’t worry if you do not know your bootloader version. The downgrader will handle the checking for you. But if you’re not using this bootloader version, I’m sorry that there is currently no software solution to unlock your iPhone 3G. You can either wait for iPhone Dev team to develop the solution or you can opt for SIM-card based unlock.

Step 1: Follow this step-by-step guide to jailbreak your iPhone 3G with firmware 2.2.1. Before your start to jailbreak backup you iPhone data synchronizing it with iTunes. You may see an instruction on how to backup your iPhone.

Step 2: After jailbreak, go to Cydia and download “3G Fuzzyband Downgrader”. You may read an instruction on how to downgrade iPhone 3G baseband using 3G Fuzzyband Downgrader.

Step 3: With the baseband downgrade completes successfully, you can use Yellowsn0w to unlock your iPhone 3G. The yellowsn0w can be downloaded freely via Cydia. For details, you can refer to my post on "Guide to unlock iPhone 3G (2.2) using Yellowsn0w". Bear in mind before your start to unlock using Yellowsn0w, please skip Step 1 and Step 2 , you should start to unlock at the step 3.

I hope this guide can benefit those who got the iPhone locked after firmware 2.2.1 upgrade. But let me emphasize again. The above instructions can only work for iPhone 3G with bootloader 5.8. Good luck!


The instructions below is quite similar with unlocking & jailbreaking iPhone 2.2.1 firmware update (iPhone 2G), the different things here, you don't need to unlock your iPhone 3G. But for iPhone 2G, unlocking and jailbreaking is very recommended instead. See the details on how to unlock & jailbreak iPhone 2G for 2.2.1 firmware.

Before you run into the details of jailbreak, i would like to mention about "unlock" and "jailbreak" words here. You’re probably aware that the word “Unlock” is missing in the post title. It's meaning to say that, there is no solution to unlock iPhone 3G for 2.2.1 firmware so far. This statement valid by the time you read this post. That means you are still bind to single carrier and can’t use SIM card from other carriers.

Let me remind you here, "unlock" word is refer to the process to open up your iPhone to accept all carriers. Unlocked iPhone allows you to use SIM card from all carriers. You are no longer bind to the official carrier (e.g. AT&T) approved by Apple. And for, "jailbreak" your iPhone means you are allowed to install 3rd party applications on iPhone. This applies to all version of firmwares. Anyways, this post is devoted for iPhone 3G users who want to jailbreak their iPhones.

Note: This guide is now updated with procedures for iPhone 3G 2.2.1 firmware. But you should read this warning carefully. Presently, you cannot unlock iPhone 3G 2.2.1 firmware using Yellowsn0w. Please use firmware 2.2 if you're planning to unlock. Check out my post on how to unlock iPhone 3G 2.2 firmware using Yellowsn0w.

UPDATED: A good news for iPhone 3G 2.2.1 user, for those who accidentally upgrade to 2.2.1 firmware and intended to upgrade with this latest firmware, now you can unlock iPhone 3G 2.2.1 firmware using YellowSn0w. Check out my post on how to unlock iPhone 3G 2.2.1 firmware using YellowSn0w. Please bear in mind, its only for iPhone 3G 2.2.1 firmware and unjailbroken iPhone 3G. Please ignore the statement above if you understand this matter.

Important: please hold and read through statement below. Before your proceed with jailbreaking you should read quoted from iPhone Dev-Team below.

This is the low down on our tools for use with the 2.2.1 firmare from Apple, read the whole post in full before attempting anything. Please note that the Windows version of QuickPwn has been updated to version 2.2.5-2

  1. GOLDEN RULE: If you have a 3G iPhone running 2.2 firmware and you want to keep your ability to use yellowns0w (or the option to use it in the future) do NOT use QuickPwn, and do not use the official ipsw or the iTunes update process without using PwnageTool.
  2. Yellowsn0w will NOT work with the baseband version (02.30.03) that is present in the recent 2.2.1 update. If you want to use Yellownsn0w you will need to create and restore using a custom .ipsw that will allow you to update safely to 2.2.1 without applying the 02.30.03 baseband update. You’ll then have a 3G iPhone running 2.2.1 with an older baseband version that is still vulnerable to yellowsn0w, following these steps ensures that yellowsn0w will still operate.
  3. Please read all parts of this post before downloading and using these tools.
  4. Read items 1, 2 and 3 again and again.
  5. At the bottom of this post are the bittorrent files for the latest versions of PwnageTool and QuickPwn.
  6. These apps are suitable for the recent 2.2.1 release.
  7. The Yellowsn0w version has been updated to 0.9.7. Yellowsn0w is available from Cydia or Installer - this version allows compatibility with pwned 2.2.1 system (not baseband). Again„ remember 0.9.7 yellowsn0w DOES NOT WORK WITH 2.2.1 (02.30.03) directly - you need to be running a ‘pwned’ version of 2.2.1 which didn’t upgrade the baseband during the restore/upgrade.
  8. Users of OS X 10.5.6 will be unable to use DFU mode correctly, please see the note towards the end of this post to easily fix this issue.

Note: If you bought iPhone with the new one, you should notice your iPhone has embedded with iPhone 2.2.1 firmware update. You should ignore Step 3 - Step 6. You might be begin jailbreak your iPhone with the Step 7 until complete...For the Step 3 - Step 6, its devoted for those who would like to upgrade their iPhone 3G with firmware 2.0 to 2.2, 2.1 to 2.2 or 2.2 to 2.2.1.

Step 1: Make sure you have upgraded to iTunes 8.0.2 and backup your iPhone data by synchronizing it with iTunes 8.0.2. See instruction here on how to backup your iPhone.

Step 2: Download QuickPwn 2.2.5-2 and iPhone 2.2.1 firmware (3G). Save them all in the same folder. Unzip QuickPwn22.zip and make sure you have all the files in place before continue.

Step 3: This following step will be guide you how to Install your iPhone firmware 2.2.1 via iTunes 8.0.2. Just connect your iPhone to your computer via USB cable and launch iTunes. Select your iPhone in iTunes. You might see all information about you iPhone and the button “Upgrade” and “Restore” appear in iTunes window.

Step 4: Hold the “SHIFT” key and click the “Restore” button simultaneously. The iTunes file dialog will pop up for you to select the firmware file. Locate the “iPhone1,2_2.2.1_5H11_Restore.ipsw” that you have downloaded in previous step and click “Open”.

Step 5: iTunes will then restore your iPhone with firmware 2.2.1 automatically. Keep your iPhone connected, don’t touch anything and wait until the process complete.


Jailbreak with QuickPwn 2.2.5-2


Step 6: Your iPhone should completely restore to firmware 2.2.1. But it’s still "Unjailbreak" right now

Step 7: Launch QuickPwn 2.2.5-2 to start jailbreak. Make sure your iPhone connect via USB cable and then click blue button to proceed.

QuickPwn 2.2.5-2


Step 8: You are required to provide the firmware 2.2.1 IPSW file. Click “Browse” button to locate the “iPhone1,2_2.2.1_5H11_Restore.ipsw” were you had downloaded in Step 2. Once complete, QuickPwn will verify with the mark symbol. Then click blue arrow button to proceed.


Step 9: You are required to configure the settings for QuickPwn. Normally, you could mark all checkboxes (i.e. Add Cydia, add installer, Replace boot logo). If you would like to keep the Apple logo already in your iPhone, left “Replace boot logo” unmarked. Click blue arrow button to proceed.


Step 10: Make sure your iPhone should still be connected with USB cable. QuickPwn requests you to confirm it once again before unlock & jailbreak process will begin. If you’re ready, click blue arrow button to proceed.


Step 11:
QuickPwn automatically puts the iPhone into recovery mode. After that, you’ll be instructed to hold Home button for 5 seconds. Then hold Home and Power buttons together for 10 seconds. Next, release Power button and continue to hold Home button until your iPhone is in DFU mode (QuickPwn will inform you automatically when you’re in DFU mode).


Step 12: During unlocking & jailbreaking process, your iPhone screen shows downloading jailbreak data and flashing NOR progress. What you have to do just keep waiting and don’t touch anything to your iPhone.


Step 13: QuickPwn will let you know the jailbreak process is successful. Your iPhone will be restarted automatically.


Step 14: Now jailbreaking process has complete with iPhone firmware 2.2.1. Finally, sync back your iPhone to restore your backups data with iTunes 8.0.2.

Step 15: For beginner user, you might be want to know what to do after Jailbreak. Check out my post here on how to use Cydia. For those who already knew about the Cydia you could ignore this step.

Note: If you have problem and troubleshooting during jailbreak using QuickPwn. You may see the details here about fixes and solution.


iPhone Dev-Team posted the third update for this unlock application. Yellowsn0w 0.96 beta is just released! As mentioned by the Dev-team, the updated version provides even more bug fixes over the previous ones. If you fail to unlock your iPhone 3G previously, please download this latest version and try out the unlock again. This would probably work.

You can download or upgrade yellowsn0w via Cydia. For more about information about how to install yellowsn0w, you can check out guide to unlock iPhone 3G (2.2 firmware).

Does this updated version work for your carrier? Feel free to leave comment and let us know your result. Also, you can report the unlock result to iPhone Dev Team directly via this link.


Does Yellowsn0w works for your carrier?


Before you try out guide to unlock iPhone 3G (2.2 firmware) using Yellowsn0w, you probably want to know whether yellowsn0w works for your carrier. iPhone Dev team has published an iPhone 3G unlock report. The report shows the general results of iPhone 3G unlock for different carriers, ranging from carrier in Australia to carrier in Vietnam.

By the time I write this post, based on the user-submitted report, the success rate of iPhone 3G unlock is around 60%. I believe the success rate will be increasing as some users reported that the latest version (v0.9.5) of yellowsn0w works with their choices of carriers, which previously did not work on the older version.

So, in case you fail to unlock the iPhone 3G previously, try out Yellowsn0w 0.95 BETA and check out the iPhone 3G unlock report.


iPhone Dev Team will soon release a software tool to unlock iPhone 3G. Today, as a preview, they have a live demo on Qik to demonstrate the unlock process.

You’ll soon see in the video how easy the unlock of iPhone 3G can be done via Cydia. The software is not yet released (but very soon) and initially can only unlock older version of baseband. For more information about unlocking iPhone 3G, you can further check out this post.

Here is the live demo:


Regarding to this post, the instructions below is quite similar with unlocking & jailbreaking iPhone 2.1 firmware update (iPhone 2G), the different things here, you don't need to unlock your iPhone 3G. But for iPhone 2G, unlocking and jailbreaking is very recommended instead. Check out my post here for those who would like to unlock & jailbreak iPhone 2.1 firmware update (iPhone 2G).

Before you run into the details of jailbreak, i would like to mention about "unlock" and "jailbreak" words here. You’re probably aware that the word “Unlock” is missing in the post title. It's meaning to say that, there is no solution to unlock iPhone 3G so far. For now, QuickPwn can only jailbreak iPhone 3G. That means you are still bind to single carrier and can’t use SIM card from other carriers.

Let me remind you here, "unlock" word is refer to the process to open up your iPhone to accept all carriers. Unlocked iPhone allows you to use SIM card from all carriers. You are no longer bind to the official carrier (e.g. AT&T) approved by Apple. And for, "jailbreak" your iPhone means you are allowed to install 3rd party applications on iPhone. This applies to all version of firmwares. Anyways, this post is devoted for iPhone 3G users who want to jailbreak their iPhones. You may also see on how to jailbreak iPhone 3G for 2.2 firmware.

Note: If you bought iPhone with the new one, you should notice your iPhone has embedded with iPhone 2.1 firmware update. You should ignore Step 3 - Step 6. You might be begin jailbreak your iPhone with the Step 7 ...For the Step 3 - Step 6, its devoted for those who would like to upgrade their iPhone 3G with firmware 2.0 to 2.1

Step 1: Make sure you have upgraded to iTunes version 8.0/8.0.1 and backup your iPhone data by synchronizing it with iTunes 8.0/8.0.1. See instruction here on how to backup your iPhone.

Note: If your iPhone still in "Unactivated" status, please activate your iPhone in iTunes first before proceed to jailbreak.

Step 2: Download QuickPwn 2.1 and iPhone 2.1 firmware (3G). Save them all in the same folder. Unzip QuickPwn21-1.zip and make sure you have all the files in place before continue.

Step 3: This following step will be guide you how to Install your iPhone firmware 2.1 via iTunes 8.0/8.0.1. Just connect your iPhone to your computer via USB cable and launch iTunes. Select your iPhone in iTunes. You might see all information about you iPhone and the button “Upgrade” and “Restore” appear in iTunes window.


Step 4: Hold the “SHIFT” key and click the “Restore” button simultaneously. The iTunes file dialog will pop up for you to select the firmware file. Locate the “iPhone1,2_2.1_5F136_Restore.ipsw” that you have downloaded in previous step and click “Open”.


Step 5:
iTunes will then restore your iPhone with firmware 2.1 automatically. Keep your iPhone connected, don’t touch anything and wait until the process complete.


Jailbreak with QuickPwn 2.1

Step 6: Your iPhone should completely restore to firmware 2.1. But it’s still "Unjailbreak" right now

Step 7: Launch QuickPwn 2.1 to start jailbreak. Make sure your iPhone connect via USB cable and then click blue button to proceed.

QuickPwn 2.1


Step 8: You are required to provide the firmware 2.1 IPSW file. Click “Browse” button to locate the “iPhone1,2_2.1_5F136_Restore.ipsw” were you had downloaded in Step 2. Once complete, QuickPwn will verify with the mark symbol. Then click blue arrow button to proceed.


Step 9: You are required to configure the settings for QuickPwn. Normally, you could mark all checkboxes (i.e. Add Cydia, add installer, Replace boot logo). If you would like to keep the Apple logo already in your iPhone, left “Replace boot logo” unmarked. Click blue arrow button to proceed.


Step 10: Make sure your iPhone should still be connected with USB cable. QuickPwn requests you to confirm it once again before unlock & jailbreak process will begin. If you’re ready, click blue arrow button to proceed.


Step 11:
QuickPwn automatically puts the iPhone into recovery mode. After that, you’ll be instructed to hold Home button for 5 seconds. Then hold Home and Power buttons together for 10 seconds. Next, release Power button and continue to hold Home button until your iPhone is in DFU mode (QuickPwn will inform you automatically when you’re in DFU mode).


Step 12: During unlocking & jailbreaking process, your iPhone screen shows downloading jailbreak data and flashing NOR progress. What you have to do just keep waiting and don’t touch anything to your iPhone.


Step 13: QuickPwn will let you know the jailbreak process is successful. Your iPhone will be restarted automatically.


Step 14: Now jailbreaking process has complete with iPhone firmware 2.1. Finally, sync back your iPhone to restore your backups data with iTunes 8.0/8.0.1.


Step 15: For beginner user, you might be want to know what to do after Jailbreak. Check out my post here on how to use Cydia. For those who already knew about the Cydia you could ignore this step.

Note: If you have problem and troubleshooting during jailbreak using QuickPwn. You may see the details here about fixes and solution.